WHAT IS A COMPLETE BRAKE JOB, AND WHY IS IT IMPORTANT?
It’s More than just ‘Slapping In’ a New Set of Brake Pads
by Jay Sicht for Goodyear Brakes
To get the best performance and long life out of your new Goodyear Brakes braking system, you need to take extra time and care to ensure your brake system works as intended.
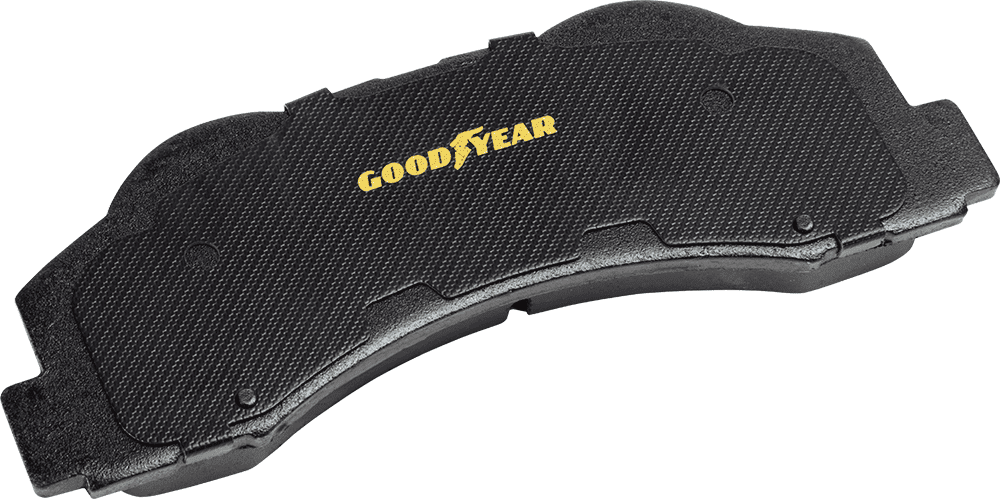
The automotive experts at Goodyear Brakes offer some tips for assessing the health of your vehicle’s braking system, as well as advanced solutions for addressing any issues. The new line of Goodyear Brakes provides premium quality brake bundles, calipers, rotors, brake pads and all the hardwarefor today’s most popular vehicles, from daily drivers to SUVs as well as light trucks. This line of brakes is backed by a national warranty, decades of production experience and one of the best-known names in automotive excellence. The Goodyear Brakes product lineup offers the ideal solution for almost every braking need – whether drivers are looking to save money on vehicle repairs, upgrade vehicle performance or restore the perfect car.
For complete repair information, Goodyear Brakes recommends referring to a printed shop manual or online service information from sources such as alldatadiy.com and eautorepair.net; which each offer vehicle-specific subscriptions. You can find a complete list of tools and products needed for the job here.
Begin the Job with an Inspection
Wear a good pair of mechanic’s gloves or thick nitrile rubber gloves to protect your hands and a quality pair of safety glasses to keep rust, grit and any errant solvent spray from getting in your eyes.
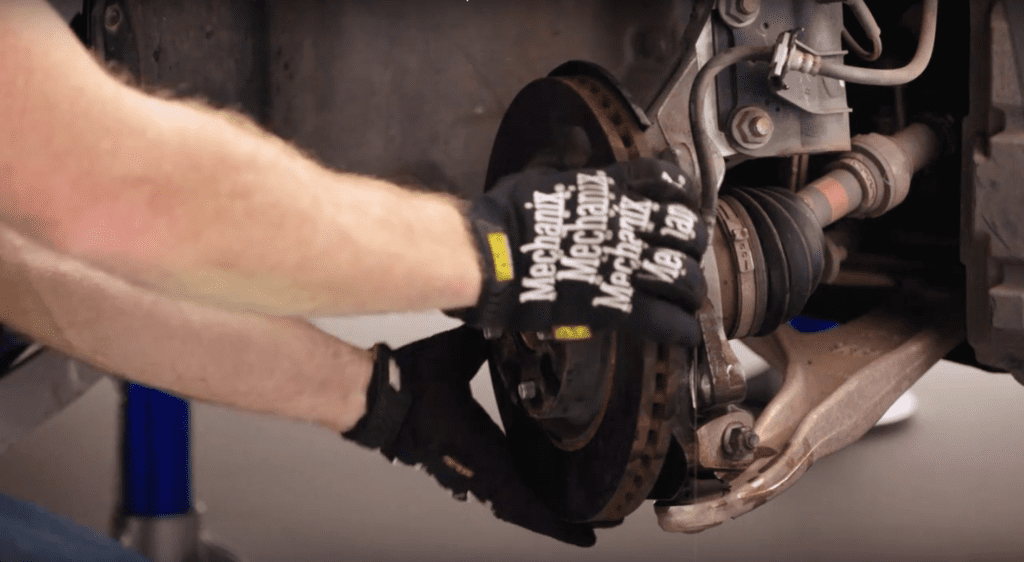
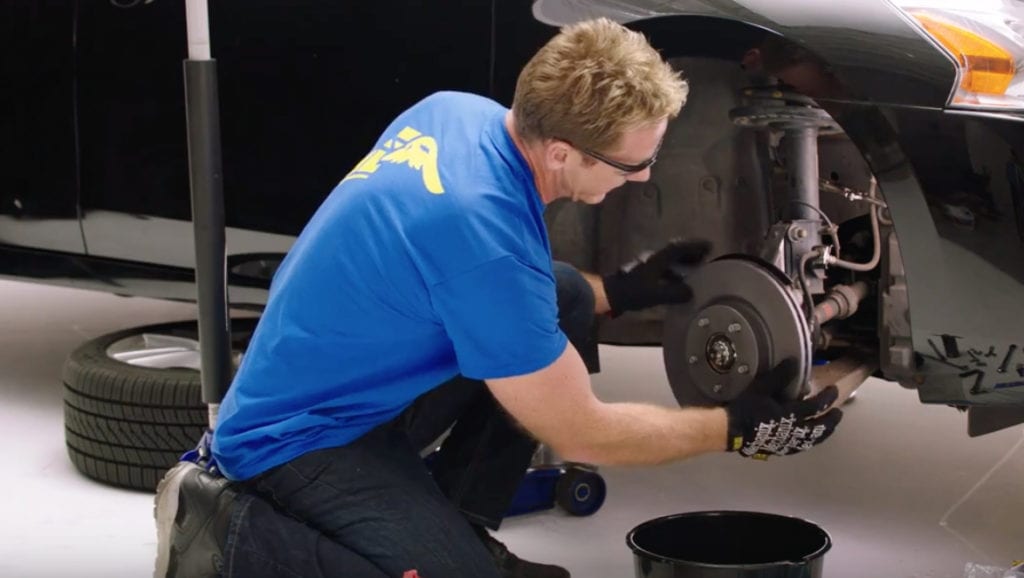
Work on your vehicle inside the garage or on a concrete driveway. Use the breaker bar to break the lug nuts loose. Refer to your owner’s manual for the proper jacking points for where to place the hydraulic floor jack and the jack stands. After you’ve safely raised the vehicle and secured it on jack stands and removed the wheels, examine the brake system for any visible damage or wear. It’s not a bad idea to take a few photos throughout the process with your smartphone for later reference on how everything goes together.
If the caliper is a floating type, see if you can move the caliper back and forth with some force. With the caliper still installed, it won’t move much with the rotor in between the pads, but it should slightly move freely and easily. Fixed calipers will have opposing pistons with brake plumbing on the outboard side, so this inspection will not apply.

Begin the Job with an Inspection
Wear a good pair of mechanic’s gloves or thick nitrile rubber gloves to protect your hands and a quality pair of safety glasses to keep rust, grit and any errant solvent spray from getting in your eyes.
Work on your vehicle inside the garage or on a concrete driveway. Use the breaker bar to break the lug nuts loose. Refer to your owner’s manual for the proper jacking points for where to place the hydraulic floor jack and the jack stands. After you’ve safely raised the vehicle and secured it on jack stands and removed the wheels, examine the brake system for any visible damage or wear. It’s not a bad idea to take a few photos throughout the process with your smartphone for later reference on how everything goes together.
If the caliper is a floating type, see if you can move the caliper back and forth with some force. With the caliper still installed, it won’t move much with the rotor in between the pads, but it should slightly move freely and easily. Fixed calipers will have opposing pistons with brake plumbing on the outboard side, so this inspection will not apply.
Continue the Inspection as You Remove Brake Components
Remove the caliper from the steering knuckle (or bracket, depending on vehicle design) using a socket wrench or breaker bar, if you need more leverage. Some vehicles use Allen or Torx (star) bits to secure the caliper. Use a bungee cord to suspend the caliper from a point on the car, such as a coil spring or from a control arm, so that its weight is not pulling on the brake hose. Letting the caliper dangle from the hose strains it and could cause unseen internal degradation to the hose. The damaged hose could act as a check valve immediately following the repair or later on, allowing pressure in to apply the brakes but not allowing the caliper piston to retract.
Next, remove the pads. Vehicle-specific repair information here can be helpful if you’re unsure or not confident in how to disassemble the pads and caliper. This will vary by make and model.
For floating calipers, this hardware does more than just retain the brake pads. For these types, hardware that is in good condition, clean and well-lubricated will ensure your brakes apply smoothly and evenly on each side. If you damaged the hardware in removing the pads or if it’s corroded, it will need to be replaced. Clips and other hardware that rely on “springiness” suffer from repeated heat cycles. Those effects are not always apparent, so Goodyear Brakes determines your brake component needs by VIN or license plate to ensure you always get the right hardware you need for the job.
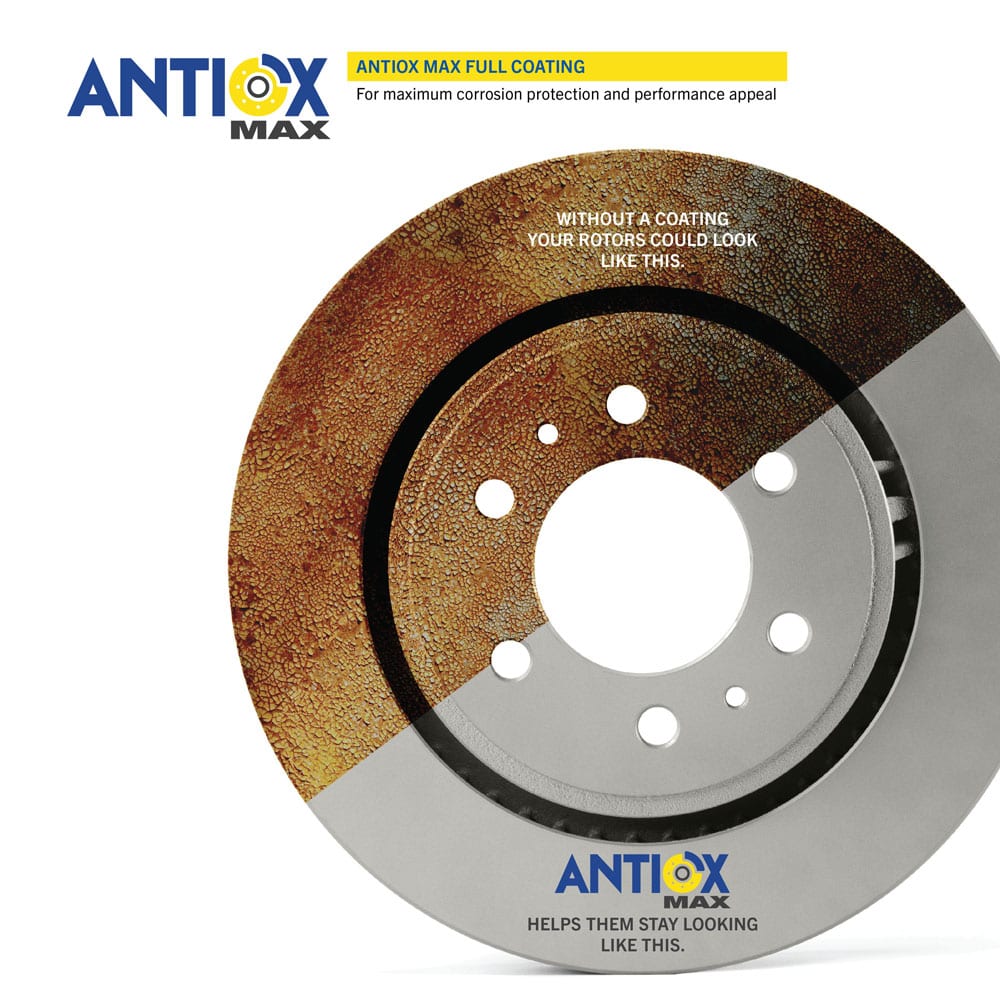
Do a visual check — how does the caliper look? Do you see any tears in the rubber accordion dust boot? Or do you see any fluid leakage? If so, you will need to replace the caliper. Even if the other side looks fine, we recommend replacing both with new Goodyear Brakes calipers to ensure equal braking performance from each side, as a worn caliper dust seal may not retract the piston as quickly. You don’t want your vehicle to pull to one side, even slightly, in a panic stop. Also, Goodyear Brakes calipers feature proprietary Antiox Max™ coating for maximum rust and corrosion protection, a critical protection needed for driving in inclement weather and brine-treated streets.
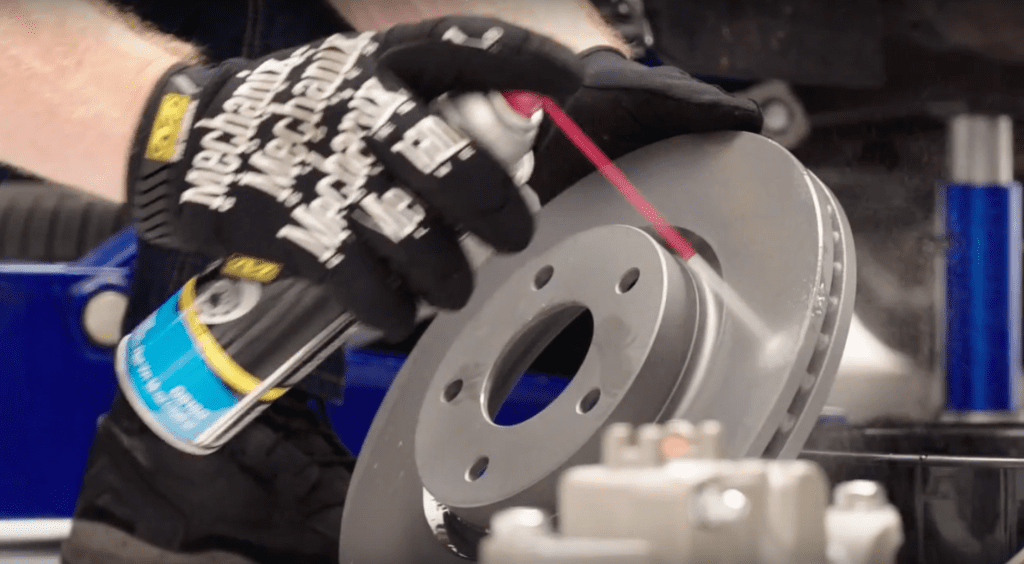
Begin the Cleaning Process
Although modern brake systems do not use asbestos and airborne contaminants are not a concern, it’s always nicer to work on components that are not grimy. Use an aerosol can of non-chlorinated brake cleaner from your local parts store or automotive section of your favorite big-box store to give the brake caliper and rotor a quick wash to minimize airborne particles. You can collect the solvent runoff with a drain pan. (The solvents will evaporate, leaving behind the grime and metal particles for disposal.)
If you’re reusing any hardware, such as guide pins, clean them and their accordion rubber boots carefully using a small brush, such as an old toothbrush, with the brake cleaner solvent.
Begin the Disassembly Process
Calipers will often mount to a bracket that mounts to the suspension knuckle, the upright cast iron or aluminum part to which the wheel bearing, shock or strut and control arm(s) mount. Remove this bracket. Examine the rotor for deep wear grooves, or uneven bluish spots or cracks, which would indicate they have been overheated. Either condition means that replacement is recommended.
Remove the rotor. Newer vehicles with unitized hub bearings will use a rotor that does not contain the wheel bearing. Some front rotors, which are usually found on older vehicles, incorporate the hub and wheel bearings. For those vehicles, it’s recommended that you clean and re-grease or replace your wheel bearings at the same time of the brake pad replacement. Refer to your service manual for more details. If the rotor is rusted to the hub, you may need to use the heavy hammer to help free it from the mounting surface.
It may be difficult to see, but each rotor should be stamped with its minimum thickness, which will be shown in mm or inches. A dial micrometer is the easiest way to measure this, and don’t be surprised if this is only the first “brake job” and they’re already too thin. Manufacturers in recent years have equipped vehicles with lighter, thinner rotors with less “meat” available to reuse, especially if any grooves are present and machining (often called “turning”) is needed at the local machine shop or auto parts store. For this reason, it makes a lot of sense to consider a complete Goodyear Brakes bundle of brake pads, rotors, calipers and hardware for longevity and predictable performance.
Reassemble with Care for a Top-Notch Brake Job
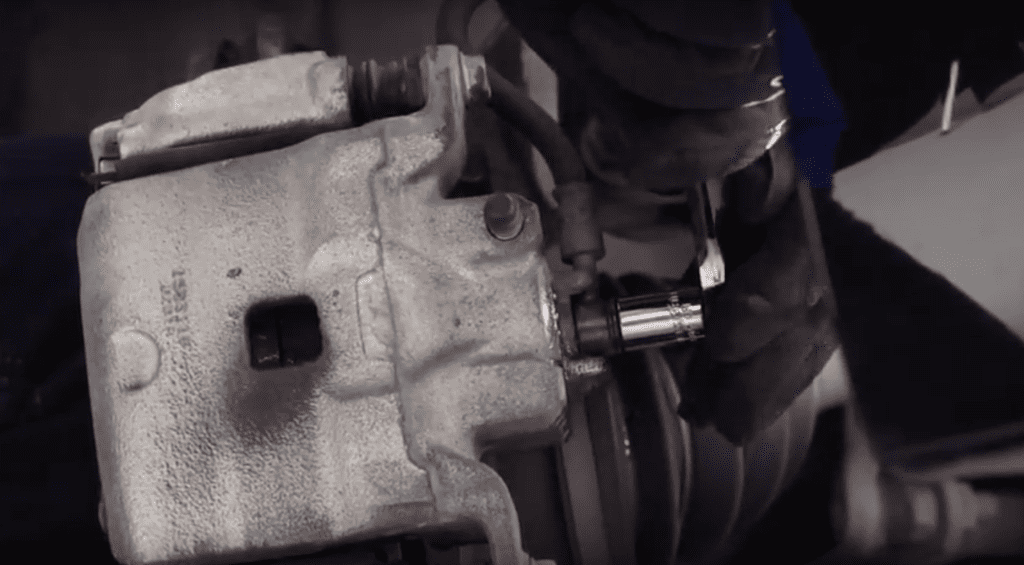
If you are reusing your calipers, the pistons will need to be compressed. For the front caliper you can often use a large C-clamp, using the old brake pad to protect the piston and a thin piece of wood, such as a paint stir stick, to protect the caliper. But we recommend a purpose-built brake compression tool, which is available at a low cost or for rent from the local parts store.
Rear calipers will require a special tool, also often available to rent, to rotate the piston in to retract it. Electronic parking brake calipers, found mostly on German makes made in the past several years, may require a scan tool or further disassembly to retract the piston.
Now, install the rotor. These are subject to tough duty, so consider a rotor that stands up to corrosion with a high-performance coating. Goodyear Brakes line of rotors feature proprietary Antiox Max™ coating for maximum rust and corrosion protection, a critical protection needed for driving in inclement weather and brine-treated streets.
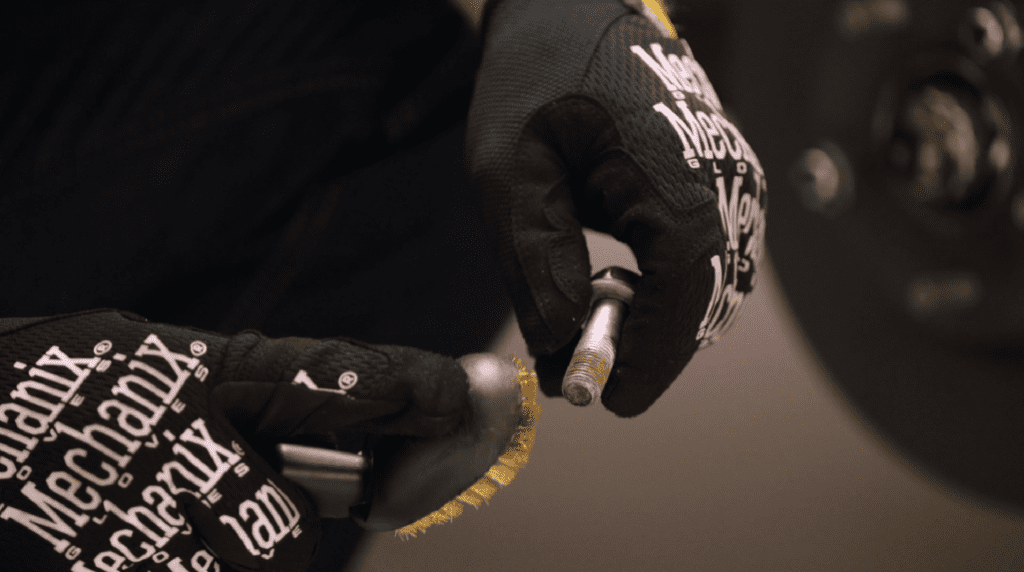
Install a lugnut on the top stud finger-tight to keep the rotor in place. Lubricate your cleaned or new caliper hardware with a high-temperature brake parts lubricant, also available where you bought the solvent. Use a gloved finger to apply the lubricant. You need only a smear on each moving surface and guide pin; if you overapply the lubricant, there is a risk it could leak onto the braking surface of the pad and rotor and contaminate the brake pad, reducing its effectiveness.
Apply blue threadlocker to the bracket and caliper fasteners. Install the bracket to the knuckle and install the pads with the new hardware. Lubricate the backs of the pads and then install the caliper. Be careful not to get any lubricant on your new pads.
We recommend using a torque wrench to tighten each fastener to manufacturer specifications. This reduces the chance of stripping any threads, particularly critical if any of your parts are aluminum. Finish the job by installing the wheel. Tighten the lug nuts snugly in a criss-cross pattern, and once the tire is on the ground, torque the wheel to manufacturer specifications in at least two stages. For example, if the factory wheel lug nut specification is 85 ft./lbs., first fasten each lug nut to 50 ft./lbs. in a criss-cross pattern. Then reset the torque wrench to 85 ft./lbs., repeating that installation pattern. Repeat all procedures for the other side, which you will now be able to do in a fraction of the time since you’ve just gained the experience of doing the first side! Now test thoroughly for proper braking operation in your driveway. You should have a firm pedal, no brake warning dash light on, and no grinding noises.
Break-in the Brakes
You may think you’re done at this point, but new brakes require a break-in procedure to evenly transfer the pads’ friction material to the rotors. This is called “breaking in,” “bedding in” or “burnishing.” This will eliminate glazing, which causes noise and reduced performance. An empty parking lot is ideal for this. A good quality brake check procedure includes performing 15 stops from 35 mph to 40 mph down to 5 mph. Perform nice easy stops – don’t slam on the brakes. Try to avoid panic stops or hard braking for approximately 200 miles.